RoboShell Backup 1.1 - now with TrueCrypt integration
Apr 30 2012, 22:44 | tags: backup, roboshell-backup, truecrypt
Update (Mar 04 2015):
Development of TrueCrypt stopped in May 2014. The only version still available on the official TrueCrypt website (version 7.2) supports decryption only, therefore it’s not suited for usage with RoboShell Backup.
For more information about TrueCrypt’s current status as well as an article about whether it’s still secure (it is!), and to download TrueCrypt 7.1a (the version RoboShell Backup’s integration was developed and tested with), see the TrueCrypt Final Release Repository.
Everything else on this page is still valid, except for the links to truecrypt.org.
Second Update (Jan 07 2017):
RoboShell Backup now supports encryption via VeraCrypt as well.
VeraCrypt is a fork of the last TrueCrypt version with additional security fixes.
I just published RoboShell Backup 1.1.
Apart from minor and cosmetical changes (nicer-looking setup, more documentation), there is one “big” new feature:
RoboShell Backup now supports writing to USB drives encrypted with TrueCrypt.
If you don’t know TrueCrypt, take a quick look at the introduction.
I read about it in Scott Hanselman’s A basic non-cloud-based personal backup strategy when I was looking for an encryption tool. Scott actually uses BitLocker in his blog post and just mentioned TrueCrypt as an alternative, but BitLocker is no option for me because it’s only in Windows 7 Enterprise or Ultimate.
So I decided to try TrueCrypt, and I was sold on it when I read this (emphasis by me):
I forgot my password - is there any way (‘backdoor’) to recover the files from my TrueCrypt volume?
TrueCrypt does not allow recovery of any encrypted data without knowing the correct password or key. We cannot recover your data because we do not know and cannot determine the password you chose or the key you generated using TrueCrypt. The only way to recover your files is to try to “crack” the password or the key, but it could take thousands or millions of years (depending on the length and quality of the password or keyfiles, on the software/hardware performance, algorithms, and other factors). If you find this hard to believe, consider the fact that even the FBI was not able to decrypt a TrueCrypt volume after a year of trying.
Source: TrueCrypt FAQ
Now back to TrueCrypt integration in RoboShell Backup 1.1:
If you take a look at the config file, you’ll notice a few new settings for “TrueCrypt mode” at the bottom:
<!--
Values:
"enabled": set to 1 to enable TrueCrypt mode
"exepath": folder and path of TrueCrypt.exe on USB drive (without drive letter - this will be taken from the "usbdrive" value above)
"volume": folder and path of TrueCrypt volume on USB drive (again, without drive letter)
"mountto": drive letter to mount the volume to (with backslash, must be unused)
-->
<truecrypt enabled="0" exepath="truecrypt\truecrypt.exe" volume="Backup" mountto="X:\"/>
TrueCrypt works in two modes: you can install it on your machine, and you can use it in portable mode.
RoboShell Backup supports only portable mode, so you can put TrueCrypt directly on the USB drive, and you can use the drive on any machine without needing to install TrueCrypt there before.
Note that you need to have administrator privileges in order to use portable mode (see the “portable mode” link above for more information).
In order to use a TrueCrypt encrypted USB drive with RoboShell Backup, you need to set it up once (once per USB drive, if you have more than one).
Here are the steps how to do this:
-
Download the installer from the TrueCrypt download page and run it.
-
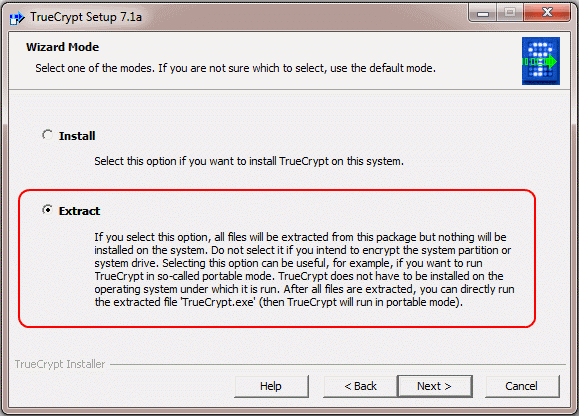
After accepting the license terms, choose that you want to extract TrueCrypt, not install it:

-
Extract it to your USB drive, into a folder called “TrueCrypt”.
You can pick a different folder if you like - but then you need to change that in the config file, because the default value is a subfolder named “TrueCrypt”:exepath="truecrypt\truecrypt.exe" -
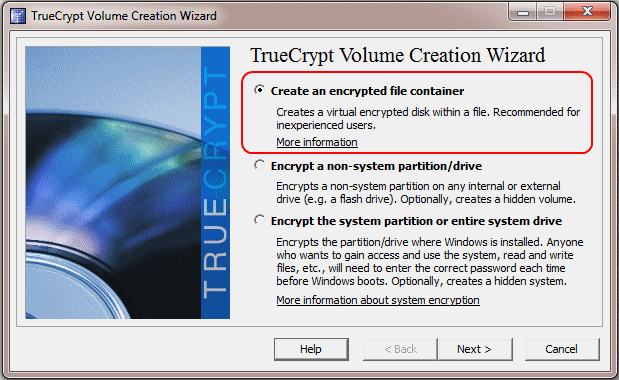
Go through the Beginner’s tutorial to create a new TrueCrypt volume, using the TrueCrypt.exe that you just copied to the USB drive.
You can follow the tutorial exactly as written, including creating an “encrypted file container” in this screen:
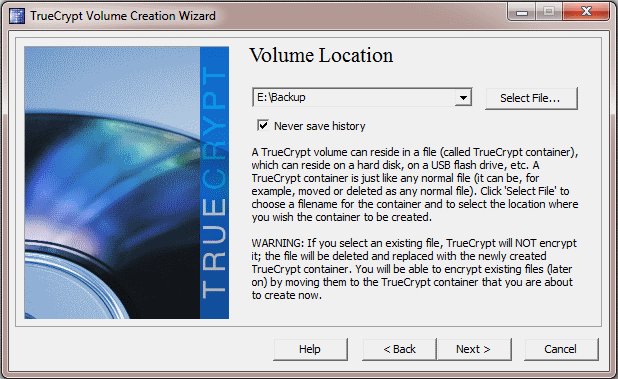
When you are asked for the volume’s location, put it into the root directory of your USB drive and call it “Backup”:

(in my case, the USB drive is drive E:)
Again, you can change the location and name of the volume as you like.
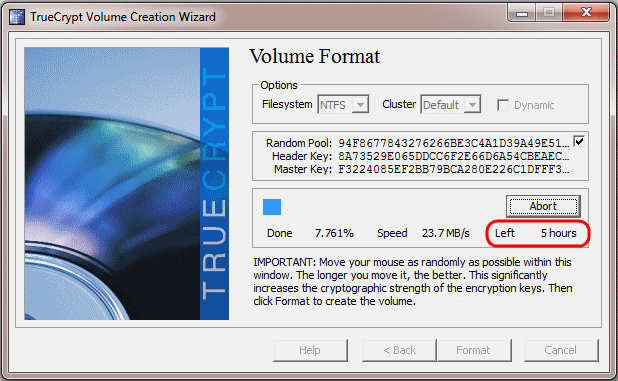
If you do this, don’t forget to alter the config file, because “Backup” in the root directory is the default value there:volume="Backup"Note that creating the volume on a moderately large disk (460 GB in my case) seems to take forever, so take your time :-)

That was the volume creation so far.
If you have more than one USB drive, repeat these steps for each one.
Make sure to use the same locations and names for the TrueCrypt folder and the volume on all of them.
Now your USB drives are ready to go.
For the last step, there are two more settings in the config file that we need to change:
enabled="0"
Set this to “1” to enable TrueCrypt mode.
mountto="X:\"
In order to use your newly created volume, TrueCrypt needs to mount it as a separate drive. The default drive letter for this is X:.
If you already have a drive X: on your machine, change this config value to another drive letter which is unused on your machine, otherwise leave it as it is.
That’s it!
If you start NasToUsb.bat now, RoboShell Backup will do the following:
-
Use the
TrueCrypt.exeon the USB drive to mount the volume (on the USB drive too) to the configured drive letter on your machine.
(A TrueCrypt inputbox will pop up, where you need to enter the password you encrypted the volume with.) -
Copy everything from the NAS as usual, but to the mounted drive letter instead of the “normal” USB drive letter.
-
When the copying is finished, call
TrueCrypt.exeon the USB drive again to unmount the volume.
Because TrueCrypt runs directly from the USB drive in portable mode, this will work on any machine, no matter if TrueCrypt is installed there or not.
The only caveat is that you need administrator privileges, and that on Windows Vista and above, an UAC dialog will pop up before each TrueCrypt call (both mounting and unmounting).
