Tinkerforge Weather Station, part 2 - Connecting to a Raspberry PI
Aug 15 2013, 22:16 | tags: hardware, raspberry-pi
This post is part of a series: Tinkerforge Weather Station
- Tinkerforge Weather Station, part 1 - Intro and construction
- Tinkerforge Weather Station, part 2 - Connecting to a Raspberry PI (this post)
- Tinkerforge Weather Station, part 3 - Continuing the project after a decade
This is the second part of me playing around with the Weather Station Starter Kit from Tinkerforge.
In the first part, I assembled the Weather Station (including Wi-Fi) and wrote a basic application in C# for it.
In the meantime, my ordered Raspberry PI has arrived. I’m planning to control the Weather Station with a Raspberry because I don’t want to leave one of my “real” computers running (and wasting electricity) all the time. The Tinkerforge guys have a tutorial how to put the Raspberry PI into the Weather Station, but I won’t do that - instead, I will separate it from the Weather Station and leave it inside the house, for two reasons:
-
It allows me to power the Weather Station with the cheaper USB power supply instead of the Step-Down Power Supply.
-
I have better physical access to the Raspberry as it’s inside the house (and I can put it anywhere in the house, as long as it has an Ethernet connection), so I can use it for something else as well in the future.
Concerning programming:
I know that the Raspberry’s “home” language is Python, but I don’t know Python much. i just know the absolute basics, because I needed to learn them while creating this site (it runs on Blogofile, and I needed to write some Python to create Mako templates).
So I decided to code in C#/.NET at the beginning (Mono, to be specific).
I’ll probably try Python on my Raspberry some day, but just starting with .NET/Mono was tempting: being new to electronics in general, Tinkerforge, Raspberry PI and Linux, it’s nice to have at least one component that I’m already a bit familiar with :-)
Installing the operating system
Before my Raspberry PI even arrived, I already googled a bit about running Mono on it and found out that apparently Mono doesn’t work equally well on all available Linux distributions.
Several sources suggest to use the Soft-float Debian “wheezy” image.
Quote from the last link:
Though multiple images are available in the below mentioned download page, please note that at this point only the Soft-float Debian “wheezy” image can be used to install Mono with out issues. This is because Mono doesn’t support hard-float for Raspberry Pi (simplified version) and some runtime methods like DateTime won’t work if you are using a hard float version. So, you need to download the Soft-Float Debian image and transfer the image file to the SD card.
Even though there is a new installer called NOOBS available (which seems to be best suited for…well…noobs like me), I decided to start with Soft-float Debian in the hope to get Mono to run without problems.
This means that I couldn’t use NOOBS, because even though it comes with several different Linux distributions, Soft-float Debian isn’t one of them. So I followed the steps in this tutorial to get the image on my SD card.
No monitor
Next surprise: My desktop machine has two monitors, and neither of them has a HDMI connector - only DVI, and I don’t have an adapter. The only device in the house with a HDMI connector is the TV, but I wasn’t able to use it because my girlfriend was watching a movie at this moment. So I had no monitor available to connect to the Raspberry.
Thanks to Google, I found a great walkthrough for absolute beginners how to get started with a Raspberry PI without keyboard and monitor connected:
Running the Raspberry Pi headless with Debian Linux
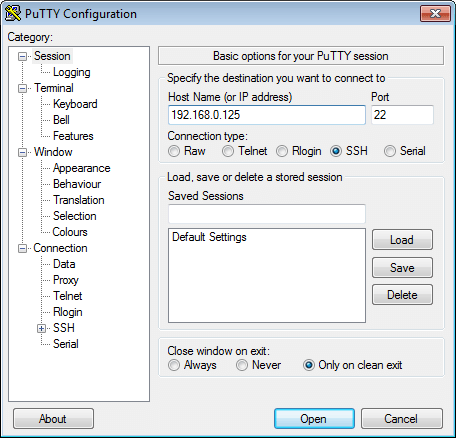
So I gave it a try and installed PuTTY (which I had heard of, but never used before), and it was really trivial to connect to the Raspberry:
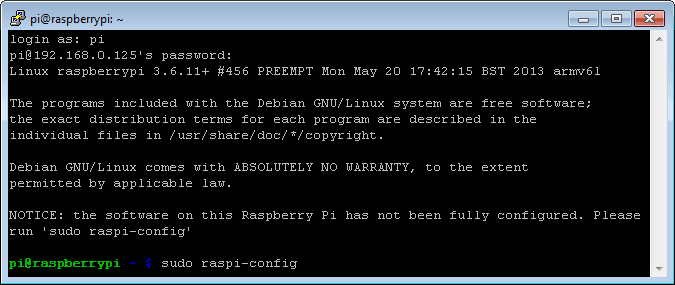
After logging in, I followed the instructions on the screen and started the basic configuration:
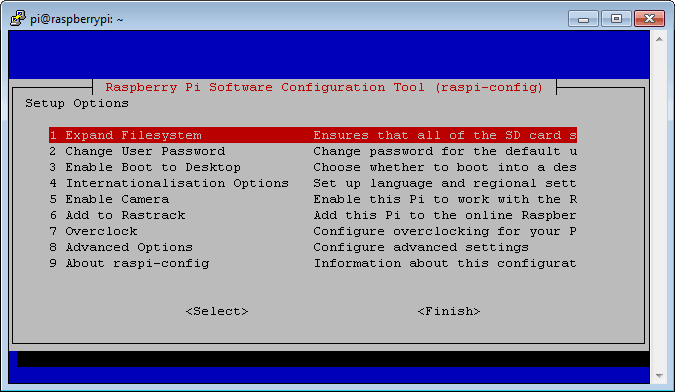
Then, out of curiosity, I used the cursor keys, navigated to Advanced Options to peek inside, and…didn’t know how to get back!
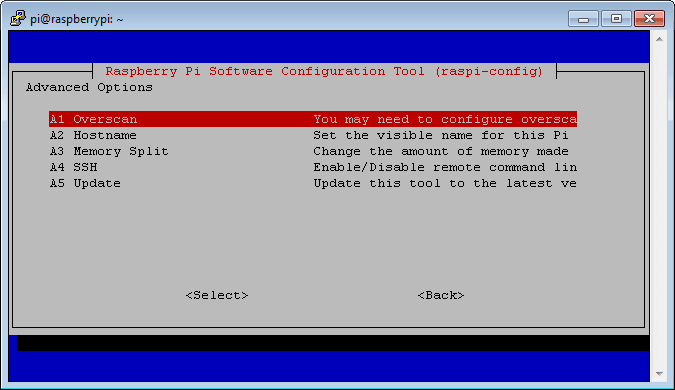
I couldn’t get to the <Back> option at the bottom with the arrow keys…I first had to find out via Google that you need to press Tab to switch from the menu items in the middle to the <Select> and <Back> at the bottom.
For now, I changed only two things in the whole setup:
- Expand Filesystem - to use all the available space on the SD card
(don’t know how large the root partition was before, but it sounded like a good idea) - Change User Password - for the sake of security, obviously!
The tutorial ends with this:
So far we have setup ssh which provides a command line for communicating with the Raspberry Pi and can be used for transfering files (scp and sftp). If you require GUI access then we need to look at a remote access application such as VNC - see next tutorial.
That sounded good, so this is what I did next.
Installing TightVNC
The VNC tutorial is as good as the “Getting started” tutorial.
Installing a VNC server is just a matter of two lines:
(actually only one just for VNC, but the tutorial says that the update line before is important)
sudo apt-get update
sudo apt-get install tightvncserver
Side note:
For someone used to Windows installers (like me), installing something by just typing sudo apt-get install foo feels strange at first (strange as in “seriously, that was all??”). Now I understand why the Linux guys are so enthusiastic about their package managers.
Being a Windows guy, I’m no stranger to package managers as I’m using NuGet and I know that Chocolatey exists, which is basically sudo apt-get for Windows. It’s even installed on my machines, but I just played around with it a bit and installed a few small tools like 7-Zip and Fiddler, nothing more. I didn’t really realize its power, but I guess that’s because most of the available packages are “small” developer tools. I wonder whether it would be more widespread across Windows users if you just could do cinst ms-office.
Now back to the VNC installation:
I set up VNC to automatically start after reboot, but I won’t list every single step here, because it’s all in the tutorial.
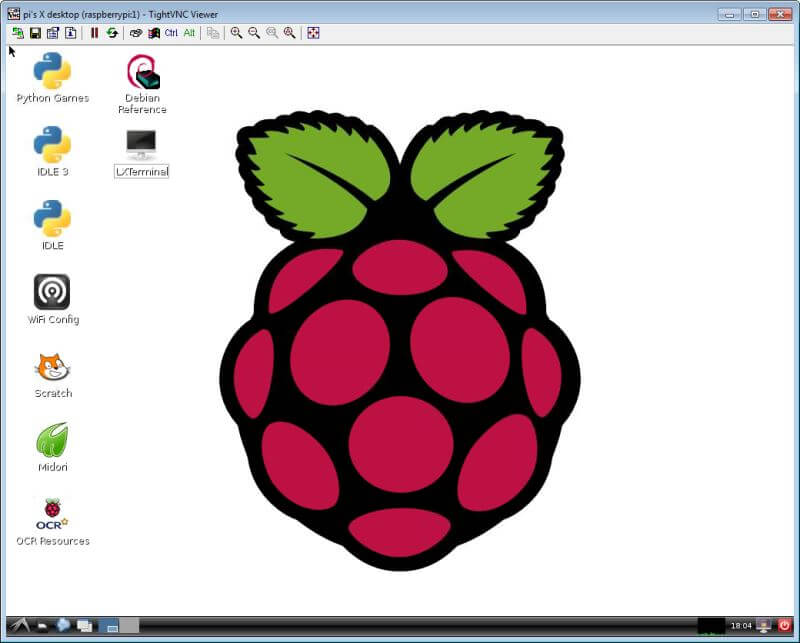
Finally, I was able to connect to the Raspberry’s desktop via VNC:
Installing Mono (and verifying that it works)
I just followed this tutorial to get started with Mono. Again, the installation is just one line:
sudo apt-get install mono-complete --fix-missing
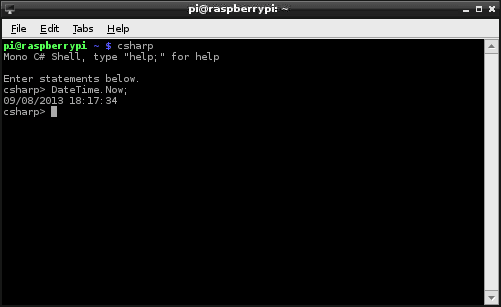
The tutorial also shows how to test basic functionality: For example, typing csharp in Bash starts the Mono command line, where you can test single commands like DateTime.Now;:
From what I’ve read, it’s possible to write a .NET app in Visual Studio, copy the compiled .exe to a Linux machine running Mono, and it just works there.
So I decided that for a start, I would just try to run the demo application from the first post on the Raspberry PI and see what happens.
To actually see a difference on the Weather Station’s display, I added one more line of code:
Before:
lcd.WriteLine(0, 0, "HELLO TINKERFORGE");
lcd.WriteLine(2, 0, "Temperature:");
lcd.WriteLine(3, 0, string.Format("{0} {1}C", temp, (char)0xDF));
After:
lcd.WriteLine(0, 0, "HELLO TINKERFORGE");
lcd.WriteLine(1, 0, Environment.OSVersion.ToString());    // <-- NEW LINE
lcd.WriteLine(2, 0, "Temperature:");
lcd.WriteLine(3, 0, string.Format("{0} {1}C", temp, (char)0xDF));
This is how it looks now, when started from my Windows 7 notebook:
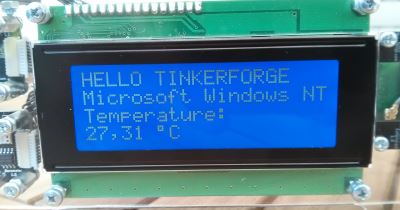
(the version number is cut off, but never mind)
Then, the next problem: how do I get the compiled exe from my Windows machine on the Raspberry PI?
Directly accessing the Windows machine from the Linux machine (or the other way round) sounded complicated, so I just used my NAS as a temporary file store and copied the exe from my Windows machine to the NAS.
Now, getting it on the Raspberry was just a matter of figuring out how to access a network share from the Linux File Manager: smb://NameOfTheNAS
The big moment
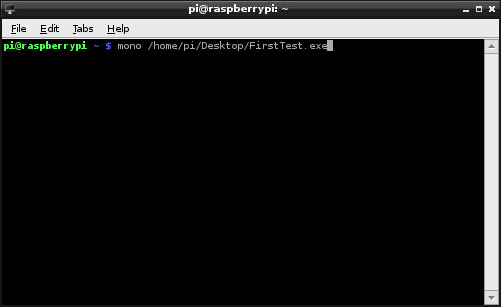
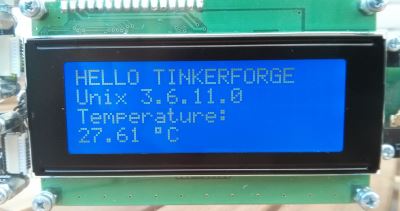
Success!
Conclusion
It works, but it’s just a basic example. There’s a lot of stuff missing that’s needed for real use, like:
- periodically check temperature, air pressure etc. and save the data somewhere (probably on Xively, as mentioned in the docs)
- make use of the LCD Bricklet’s four buttons
- consider unforeseen problems like lost connections etc.
- auto-start on reboot
So in the next part, I will write the real app to interact with the Weather Station.
